How to setup a Virtual Host on localhost with XAMPP on Debian

Although a web developers can run and test as many as sites using localhost with their website’s folder address but sometimes they need to develop and run each website in its own environment like a production web server. Here it comes the uses of virtual hosts. It is the practice of running more than one website (that targets local resources) on a single machine.

Virtual hosts are IP-based (like 127.0.1.1), means you have a different IP address for each website, or ‘name-based’ (or say like domain name), means you have multiple names running on each IP address. This practice using XAMPP comes in handy when you want to simulate a production environment, while working in development environment, locally accessing to your project by a normal URL in the browser.

In short we need to follow these 5 steps to setup a custom virtual host :

  • Step 1 : Edit the httpd.conf file to allow the use of vhosts.conf file.
  • Step 2 : Create a custom domain in the hosts (/etc/hosts) file.
  • Step 3 : Create a custom virtual host.
  • Step 4 : Start/Restart Apache Server.
  • Step 5 : Test it.
Step 1 : Allow the use of vhosts.conf file

httpd-vhosts.conf file is not used as default by the XAMPP. So to use this file during the runtime of Apache server, we need to include this file in httpd.conf. Open file httpd.conf in Gedit (you can use any of your favorite code editor) located in /opt/lampp/etc as administrator or superuser . httpd.confor just type and run the following command in your terminal :

sudo gedit /opt/lampp/etc/httpd.conf

Search the following line in the file using find and comment it out by removing pond (#) sign :

#Include etc/extra/httpd-vhosts.conf

Save the file and you’re ready to configure your custom virtual hosts.

Step 2 : Create a custom domain in the hosts file

Now we need to create a custom domain where our Apache virtual host will point to. Normally this custom domain is an IP (127.0.0.xx) and a custom name.

To do this we need to open hosts file located in /etc folder of system using Gedit as administrator/superuser, or just by typing the following command and run it in the terminal:

sudo gedit /etc/hosts

Now here in example our IP will be 127.0.1.2 and the domain mycustomproject.zyx. So at the end our hosts file should be look like as under :

127.0.0.1	localhost
127.0.1.2	mycustomproject.zyx

#don't touch other existent values
# The following lines are desirable for IPv6 capable hosts
::1     ip6-localhost ip6-loopback
fe00::0 ip6-localnet
ff00::0 ip6-mcastprefix
ff02::1 ip6-allnodes
ff02::2 ip6-allrouters

Save the file. Above here we have set the custom domain mycustomproject.zyx as an alias for the local IP address 127.0.1.2.

Step 3 : Create a custom virtual host

Now we need to create the virtual host for the above said custom domain in the httpd-vhosts.conf file located in /opt/lampp/etc/extra. Open the file in Gedit as administrator/superuser or just type and run the following command in a terminal to edit the file :

sudo gedit /opt/lampp/etc/extra/httpd-vhosts.conf

And we create our own virtual host in this file as shown in our custom domain in the vhost file of the system, the IP port that we are going to use is 127.0.1.2, therefore our virtual host will be:

<VirtualHost 127.0.1.2:80>
  DocumentRoot "/opt/lampp/htdocs/my-project"
  DirectoryIndex index.php

  <Directory "/opt/lampp/htdocs/my-project">
	Options All
	AllowOverride All
	Require all granted
  </Directory>
</VirtualHost>

Above is the minimal configuration of VirtualHost. Save the file, and we are ready to test it. Extended configuration example can be as below, if required and is up to you.

<VirtualHost 127.0.1.2:80>
	ServerAdmin yourEmailID@example.com
	DocumentRoot "/opt/lampp/htdocs/my-project"
	ServerName mycustomproject.zyx
	ServerAlias www.mycustomproject.zyx
	DirectoryIndex index.php
	ErrorLog "/opt/lampp/htdocs/my-project/error.log"
	CustomLog "/opt/lampp/htdocs/my-project/access.log" common

	<Directory "/opt/lampp/htdocs/my-project">
		Options All
		AllowOverride All
		Require all granted
	</Directory>
</VirtualHost>

Step 5 : Testing the configuration

To test our configuration we create a simple PHP file (index.php) that will contain the following PHP code in the folder /opt/lampp/htdocs/my-project:

<?php
echo "Hello! Vhosts Configured successfully.";
?>

Start XAMPP using the following command :

sudo /opt/lampp/lampp start

Start the browser and navigate to http://mycustomproject.zyx/ or http://127.0.1.2/ and you should get as output “Hello! Vhosts Configured successfully.” in the browser.

How to install XAMPP & Composer on Linux – Debian

XAMPP by bitnami is a complete stack of Apache, MariaDB(MySql), PHP and Perl. It is a completely free software and widely used on all platforms for web development by developers. Although we have choice to install Apache, MySql and PHP separately on Linux platform easily but many developers choose to install XAMPP for Linux. This article will let you show how to install XAMPP and Composer on Linux – Debian.

XAMPP – Download

Download the latest version of XAMPP from its official website https://www.apachefriends.org by clicking on XAMPP for Linux on home page.

XAMPP – Installation

Open the terminal and navigate to the containing folder using cd command. Possibly your downloaded file will be in Downloads folder.

cd Downloads

Change the permission of file using chmod command. Replace your downloaded filename with xampp-linux-*-installer.run in below command.

sudo chmod 755 xampp-linux-*-installer.run

Execute the file

sudo ./xampp-linux-*-installer.run

You are all set to run XAMPP on your Linux machine.
To start, stop, restart XAMPP run the following commands.

sudo /opt/lampp/lampp start
sudo /opt/lampp/lampp stop
sudo /opt/lampp/lampp restart

Setting up Environment Variables

To install PHP technologies like composer, laravel, codeigniter and many others we need to set-up PHP path as an environment variable. Below are the steps to do this.

Open file /etc/environment as root using an Gedit –

sudo gedit /etc/environment

Add the following line at the end of file and then save and exit –

:/opt/lampp/bin/php

Now we need to create a symbolic link –

sudo ln -s /opt/lampp/bin/php /usr/local/bin/php

Composer – Installation

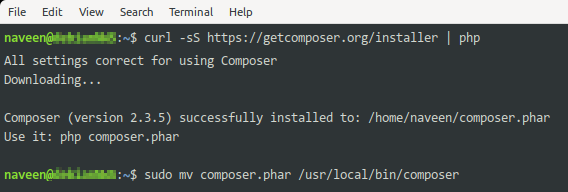
First we need to download composer using curl. If curl is not installed on your system, first install it using following command –

sudo apt-get install curl

then download composer

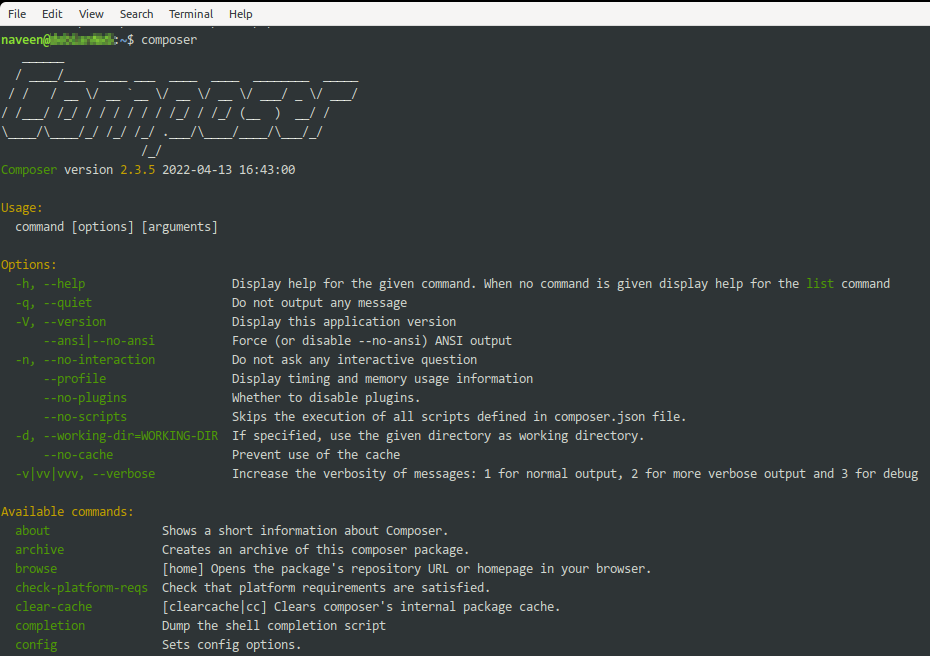
curl -sS https://getcomposer.org/installer | php

Now move composer to /usr/local/bin/composer folder using following command –

sudo mv composer.phar /usr/local/bin/composer

Done! All set.

Installing Adobe Acrobat Reader on Debian (10) Buster

Adobe Acrobat Reader is used to read/open PDF files, but wait debian buster already have Document Viewer to open PDF files then why do we need Acrobat Reader. None of the PDF viewer except Acrobat Reader in Linux is providing feature to validate signature, which we need sometimes to validate PDF documents. Just downloading AdbeRdr9.5.5-1_i386linux_enu.deb does not let you install Acrobat Reader directly on Debian Buster then how to do this?

Step : 1
First we require to add the i386 architecture using terminal command :

sudo dpkg --add-architecture i386
sudo apt-get update

Step : 2
Add library libxml2:i386 :

sudo apt-get install libxml2:i386

Step : 3
Download the Adobe Acrobat Reader (acroread) deb package here:

step : 4
Go to Downloads Folder and Install the deb package using terminal as follows :

cd ~/Downloads
sudo dpkg -i AdbeRdr9.5.5-1_i386linux_enu.deb

Terminal will through some error(s) but just avoid them and follow next step.

step : 5
Install the various dependencies require by the package (acroread) using following command.

sudo apt-get -f install

You are all set! Launch the Adobe Acrobat Reader from the terminal by :

acroread

How to automount usb drives in Debian (10) Buster?

Recently on a fresh installation of Debian Buster encountered the problem of automounting the external USB drives on my Dell N5010 Laptop. Didn’t faced such problem on Debian Stretch or older versions. After researching found that responsible package for automounting are udisks2 and libglib2.0-bin. udiskie is also responsible to automount USB drive. These all are properly installed, but didn’t working. Even due to this GParted was not opening. Even tried on the Terminal with sudo but it was showing message ‘Too few arguments’.

FIX :

Added a user systemd service to start udiskie:
/etc/systemd/user/udiskie.service with following code.

[Unit]
Description=Udiskie automount daemon

[Install]
WantedBy=graphical-session.target

[Service]
ExecStart=/usr/bin/udiskie --verbose --use-udisks2 --automount --no-config --notify --tray --appindicator

After rebooting this fixed the automounting the external USB drives and GParted too.

Best Free Vector Graphics Editors for Linux

In Short : List the best vector graphics software for Linux that can be used as an alternative to Adobe Illustrator or CorelDraw for Linux.

A vector graphics editor lets you create and edit vector graphics images, create vector objects and perform all various manipulations to it. Adobe Illustrator and CorelDraw are such premium vector graphics editors, which are used by professionals of print and digital media, but they are not available for Linux flavors.

So what are the available alternatives for Linux? We’ll show you the best available vector graphics software in Linux.

Best free vector graphics editing software for Linux

Installation instructions for Ubuntu / Debian – based Linux distributions is included in this article. But you can easily search the installation instruction for other Linux distribution online. There are a lot of help, support and tutorial articles and videos available online for these softwares.

Inkscape

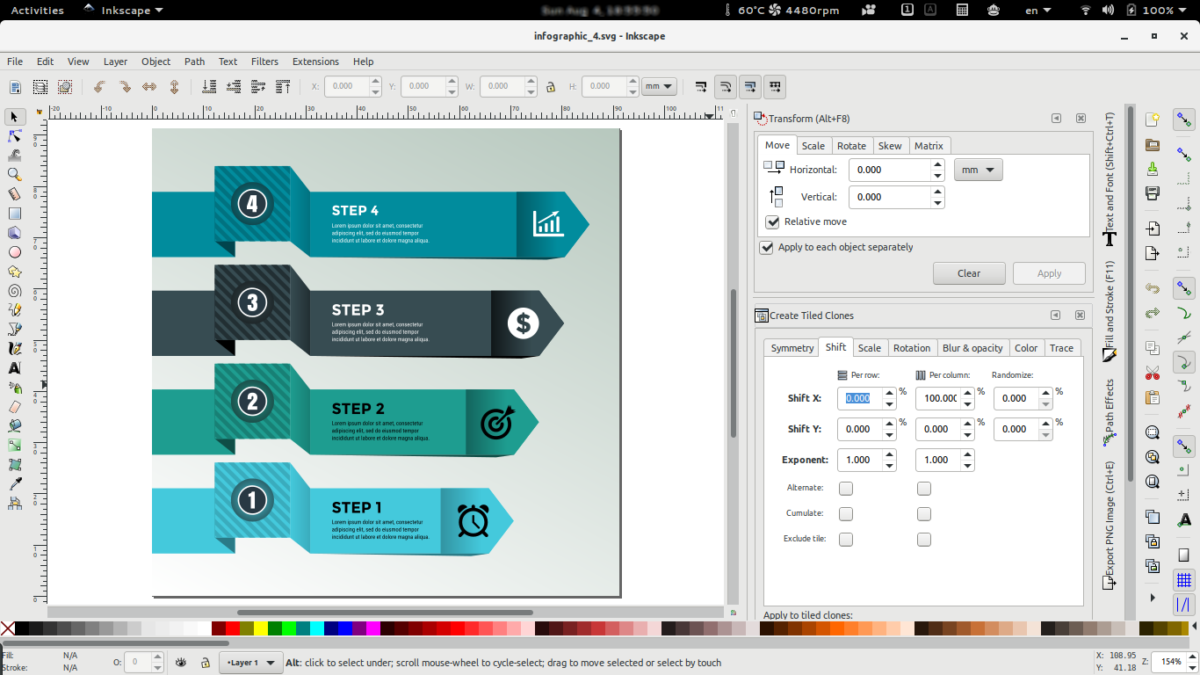
Inkscape is professional quality vector graphics software which runs on Windows, Mac OS X and GNU/Linux. It is used by design professionals and hobbyists worldwide, for creating a wide variety of graphics such as illustrations, icons, logos, diagrams, maps and web graphics. Inkscape uses the W3C open standard SVG (Scalable Vector Graphics) as its native format, and is free and open-source software.

It is obviously one of the best Linux tools for digital artists around that are actively developed. Inkscape has sophisticated drawing tools with capabilities comparable to Adobe Illustrator, CorelDRAW and Xara Xtreme. It can import and export various file formats, including SVG, AI, EPS, PDF, PS and PNG with a simple interface and options to customize functionalities with add-ons.

Object creation

  • Drawing: pencil tool (freehand drawing with simple paths), pen tool (creating Bézier curves and straight lines), calligraphy tool (freehand drawing using filled paths representing calligraphic strokes)
  • Shape tools: rectangles (may have rounded corners), ellipses (includes circles, arcs, segments), stars/polygons (can be rounded and/or randomized), spirals
  • Text tool (multi-line text, full on-canvas editing)
  • Embedded bitmaps (with a command to create and embed bitmaps of selected objects)
  • Clones (“live” linked copies of objects), including a tool to create patterns and arrangements of clones

Object manipulation

  • Transformations (moving, scaling, rotating, skewing), both interactively and by specifying exact numeric values
  • Z-order operations (raising and lowering)
  • Grouping objects (“select in group” without ungrouping, or “enter the group” making it a temporary layer)
  • Layers (lock and/or hide individual layers, rearrange them, etc; layers can form a hierarchical tree)
  • Alignment and distribution commands

Fill and stroke

  • Color selector (RGB, HSL, CMYK, color wheel, CMS)
  • Color picker tool
  • Copy/paste style
  • A gradient editor capable of multi-stop gradients
  • Pattern fills (bitmap/vectors)
  • Dashed strokes, with many predefined dash patterns
  •  Path markers (ending, middle and/or beginning marks, e.g. arrowheads)

Operations on paths

  • Node editing: moving nodes and Bezier handles, node alignment and distribution, etc.
  • Converting to path (for text objects or shapes), including converting stroke to path
  • Boolean operations
  • Path simplification, with variable threshold
  • Path insetting and outsetting, including dynamic and linked offset objects
  • Bitmap tracing (both color and monochrome paths)

Text support

  • Multi-line text
  • Uses any installed outline fonts, including right-to-left scripts
  • Kerning, letterspacing, linespacing adjustments
  • Text on path (both text and path remain editable)
  • Text in shape (fill shape following stroke)

Rendering

  • Fully anti-aliased display
  • Alpha transparency support for display and PNG export
  • Complete “as you drag” rendering of objects during interactive transformations

File formats

  • Perfectly compliant SVG format file generation and editing
  • Live watching and editing the document tree in the XML editor
  • PNG, OpenDocument Drawing, DXF, sk1, PDF, EPS and PostScript export formats and more
  • Command line options for export and conversions

Alternatively, we can install it from the terminal on Debian/Ubuntu by using following command as a root privilege user :

sudo apt-get install inkscape

sK1

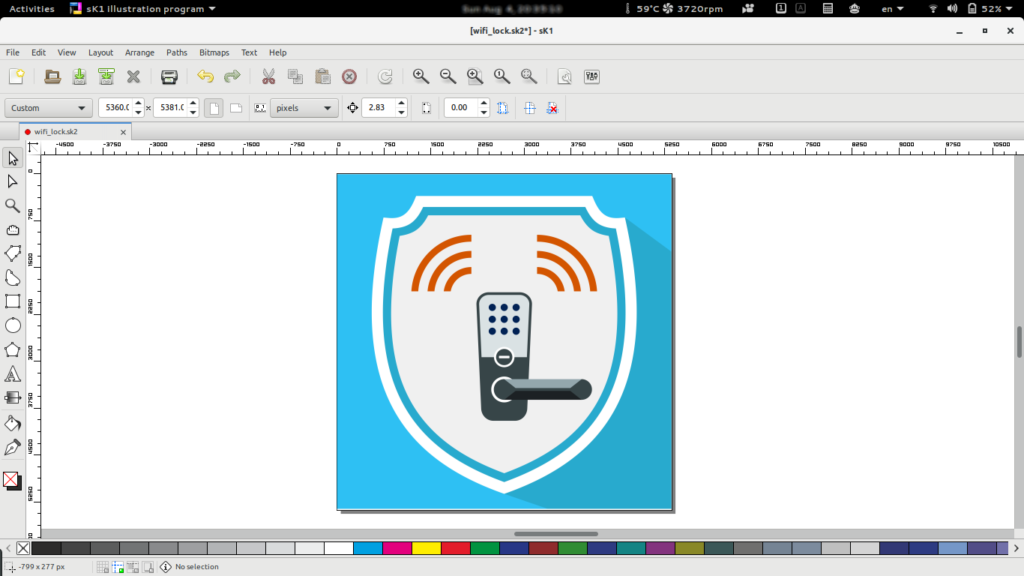
sK1 (OpenSource Solutions for Prepress) is professional quality illustration program for Windows, GNU/Linux and macOS platforms. sK1 is a powerful and mature application that makes users more productive and provides them professional and free solution even for exotic *nix OSes. Whether you are a newbie user or an experienced designer, sK1 makes it easy to get started. With its professional color-management engine and wide-range file format compatibility, sK1 provides color accuracy and drawing flexibility you need for all types of projects.

sK1 Interface

Features

sK1 supports professional publishing features, such as multiple page document, CMYK color, separations, ICC color management, professional precise printing and press-ready PDF output. So this application could substitute professional proprietary software like Adobe Illustrator or CorelDraw.

  • CMYK color-space and SPOT color support
  • Multilingual Pango text layout
  • Color management for solid colors and raster images.
  • Drawing of joint lines, Bézier curves drawing, Ellipse and Polygon drawing support.
  • Node edit, magnifier glass, text editing features.
  • Extended import/export functionality.

Installation

Linux deb and rpm packages are available from the official sK1 download page for Mint, Ubuntu, Debian, Fedora, Arch Linux, elementary OS and OpenSUSE. 

Karbon – Calligra Suite

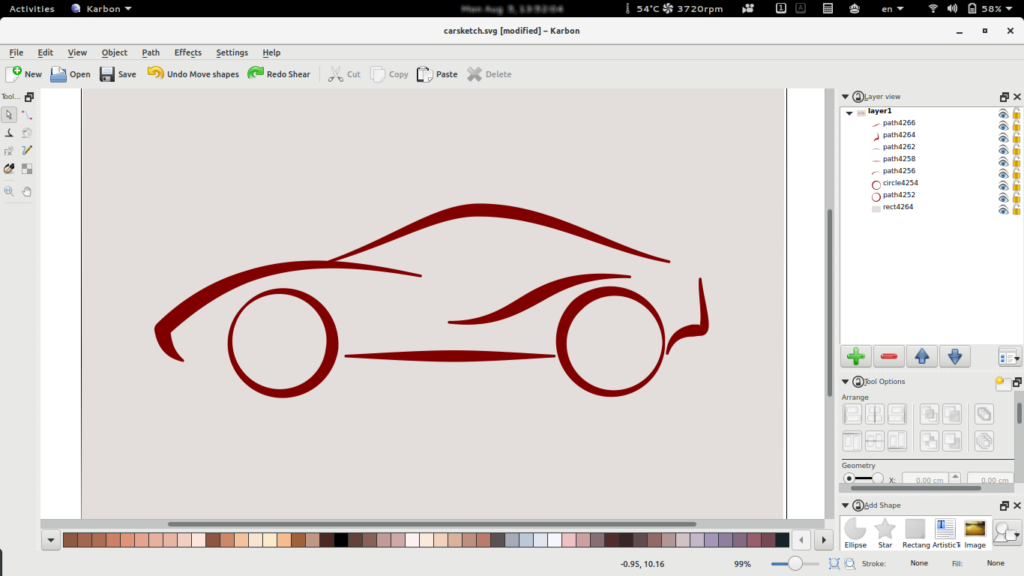
Karbon is a component of Calligra Suite, an integrated graphic art and office suite by KDE. Karbon is free software and is getting better every day. It is a vector drawing application with an user interface that is easy to use, highly customizable and extensible. That makes Karbon a great application for users starting to explore the world of vector graphics as well as for artists wanting to create breathtaking vector art.

Whether you want to create clipart, logos, illustrations or photorealistic vector images – look no further, Karbon is the tool for you!

Karbon Interface

Karboon is available for GNU/Linux, FreeBSD, MS Windows, For Mac OS X platforms. For linux it is available using dedicated package manager.

Features

  • Loading support for ODG, SVG, WPG, WMF, EPS/PS
  • Writing support for ODG, SVG, PNG, PDF, WMF
  • Customizable user interface with freely placeable tool-bars and dockers
  • Layer docker for easy handling of complex documents including preview thumbnails, support for grouping shapes via drag and drop, controlling visibility of shapes or locking
  • Advanced path editing tool with great on-canvas editing capabilities
  • Various drawing tools for creating path shapes including a draw path tool, a pencil tool as well as a calligraphy drawing tool
  • Gradient and pattern tools for easy on-canvas editing of gradient and pattern styles
  • Top notch snapping facilities for guided drawing and editing (e.g. snapping to grid, guide lines, path nodes, bounding boxes, orthogonal positions, intersections of path shapes or extensions of lines and paths)
  • Includes many predefined shapes including basic shapes like stars, circle/ellipse, rectangle, image
  • Artistic text shape with support for following path outlines (i.e. text on path)
  • Complex path operations and effects like boolean set operations, path flattening, rounding and refining as well as whirl/pinch effects
  • Extensible by writing plugins for new tools, shapes and dockers

Installation

Linux deb and rpm packages are available from the official Calligra Suite Get Calligra page for Ubuntu, Debian, Gentoo, Fedora, Arch Linux, Kubuntu and OpenSUSE. 

Alternatively, we can install it from the terminal on Debian/Ubuntu by using following command as a root privilege user :

sudo apt-get install karbon

Inkscape – Star Pyramid

Tutorial : Star Pyramid
Duration : 00:05:41
Application : Inkscape 0.91
OS : Ubuntu GNOME 16.04

Quick Outline, Watch video for more details and decoration.

Star Pyramid Inkscape
Step 1 : Draw a star of 5 corners using Create Stars and Polygons tool.

Star Pyramid Inkscape
Step 2 : Duplicate star over it and convert it using menu > Path -> Stroke to Path
Step 3 : Enable Snap Other Points – > Snap Centers of Objects

Star Pyramid Inkscape
Step 4 : Add node in internal path between star leg and while dragging new node, hold and snap it to Cusp node to object midpoint.

Star Pyramid Inkscape
Repeat step 4 until finish

Watch complete video for more details and decoration.


Inkscape – Objects to Pattern

Tutorial : Objects to Pattern
Duration : 00:04:45
Application : Inkscape 0.91
OS : Ubuntu GNOME 16.04

We can apply the same generated pattern as Fill and Stroke to any other vector object using Fill and Stroke in Inkscape. In this video tutorial I used white color so that we can change the background object color to our choice. If we need any fix background color, we can fill the outer box of the pattern objects to our choice and generate objects to pattern.

objects to pattern examples
objects to pattern examples – resized, rotation, pattern fill and pattern stroke.

Download Inkscape SVG File : object2pattern-svg-tar